How do I customise the Lumina Spark portrait?
Learn how to customise Lumina Spark portraits, including adding introduction text and changing page order
In this article, we will show you how to customise the Lumina Spark Full product. You can also follow these instructions to customise the Lumina Spark Intro product. Please note, when customising page order, some pages are available in Lumina Spark Full only.
Introduction
The Lumina Spark customisation tools help you to make a bigger impact with your clients by adding customised branding and tailoring the portrait content to your clients' needs.
The following features are available:
- Add a welcome message and change the portrait appearance.
- Customise the portrait page order and add your own content on custom pages.
- Add a personal photo and company logo to, by following these steps.
Jump to
- How to customise a Lumina Spark portrait - add a welcome message and customise portrait appearance
- Customise Lumina Spark portrait page order and add custom pages
How to customise a Lumina Spark portrait - a complete video guide
How to customise a Lumina Spark portrait - add a welcome message and customise portrait appearance
- Go to your Practitioner Profile dashboard (for full instructions, click here).
- Select Manage Projects

- Choose your project from the list.
- Go to the Products tab.
- Select the Customise button to open the customisation settings.

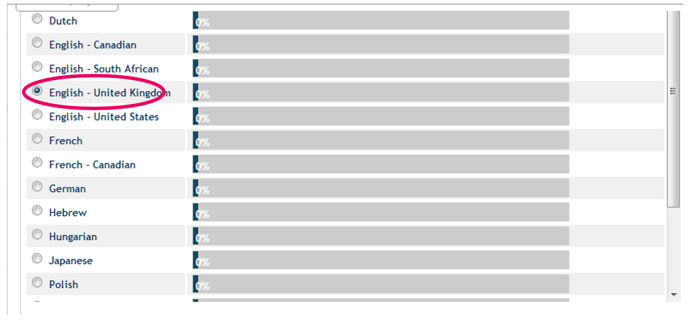
- Select the language that you want to customise. Portraits can be generated in different languages and each language has independent customisation settings.
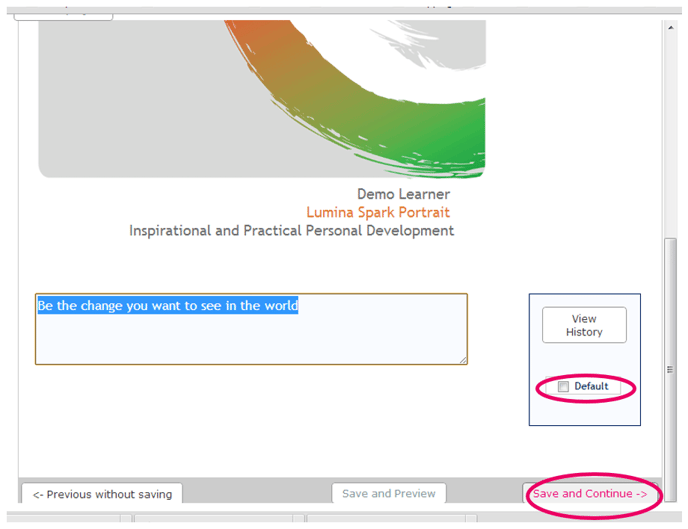
- Add custom text to the front page of the portrait. You can leave this blank if you don't want to add any text.
Suggestion: you could add the name of the programme where the portrait is being used, your client's slogan or a quote. - Optionally, tick the Default box to apply this setting to all new projects created in future and any existing non-customised projects.
- Press Save and Continue.
- Add a Welcome Message, then press Save and Continue.
Your name will automatically appear at the bottom of your message, so you don't need to enter it again in the text box.
This message will be displayed to Participants in their portraits. You can personalise the message with the Participant's first name by using the code {FIRST} and their last name by using the code {LAST}. For example, you could write Dear {FIRST} as the greeting line.
You can also add a picture of yourself and a signature image to the Welcome Message page. This is done by following these steps.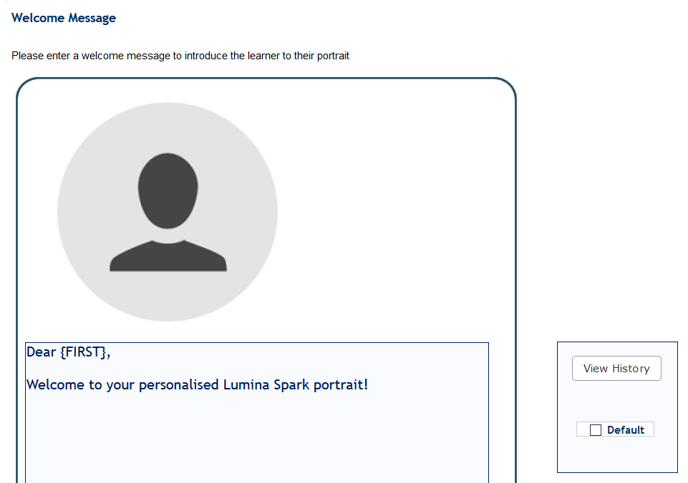
- Configure the Portrait Appearance settings. You can configure settings for:
- Style of border used on each page. Click on the desired option.
- Whether a notes section is included on each page. Click on the desired option.
- Page number positioning. Choose from the drop down menu.
- Whether any logos are displayed in the portrait. This applies to logos that you have uploaded when customising your Practitioner Profile. Choose from the drop down menu.
Once done, select Save and Continue.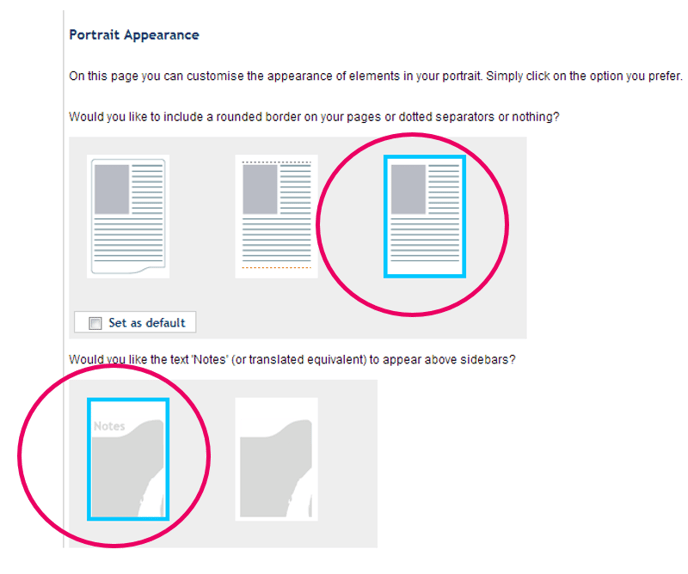
- A confirmation dialogue is shown, confirming that you have finished the first part of the customisation wizard. Select Save and Continue to move to the next part of the customisation wizard where you can edit portrait page order.

Please now move to step 6 in the next section of this knowledge base article to continue instructions on how to customise the Lumina Spark portrait page order.
Customise Lumina Spark portrait page order
- Go to your Practitioner Profile dashboard (for full instructions, click here).
- Select Project Management in the left-hand menu.

- Choose your project from the list.
- Go to the Products tab.
- Select the Manage Pages button to open the page order customisation settings.

- In the portrait page order customisation screen, you will see:
- Left-hand panel: the pages that are currently included in the portrait.
- Right-hand panel: any pages that are not currently included in the portrait.
- You can perform the following actions:
- Rearrange the pages: drag and drop the pages in the left-hand panel.
- Add a page: click on the page in the right-hand panel. The page will be inserted as the final page in the portrait. Drag and drop this to rearrange as required.
- Remove a page: hover over the page and select Remove. The removed page will move to the right-hand panel and can be re-inserted later.
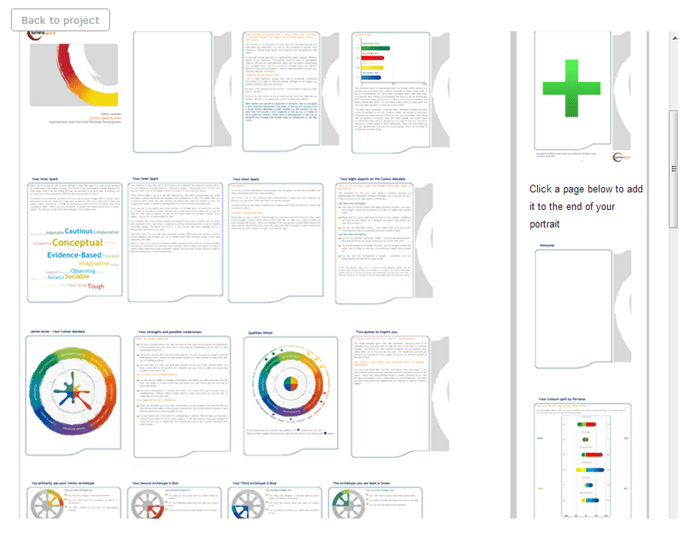
- You can also add pages from the Lumina Spark Workbook to the Lumina Spark portrait:
- Scroll down and click on the plus (+) button to display all available pages from the Lumina Spark Workbook.
- Click on a page to add it to the Lumina Spark portrait. It will appear at the end of the Lumina Spark portrait.
- Drag and drop the page to rearrange it amongst the Spark portrait pages, as required.

- To add your own content to the Lumina Spark portrait, you can create a custom page. To do this, click the green cross icon in the right-hand panel. For full instructions, see these steps.
- Once you have finalised your page order, you can optionally make this order default for all new projects created in future and any existing non-customised project. To do this, scroll down and tick the box net to Make the Portrait order above your default order.

- Optionally, you can start again by resetting the portrait page order. There are two options:
- Select Reset to Default if you have already configured you own default page order and you want to restore this project to use those page order settings.
- Select Reset to Lumina Suggested to reset the page order in this project to the page order suggested by Lumina.

- Select Reset to Default if you have already configured you own default page order and you want to restore this project to use those page order settings.
- When you have finished customising the portrait page order, scroll to the bottom and press Save.
- If any portraits already exist in the project, you must regenerate them to apply the new customisation settings. For full instructions on how to regenerate a portrait, click here.
Add a custom page to the Lumina Spark Portrait
Click on the page icon with the green cross in the right-hand panel.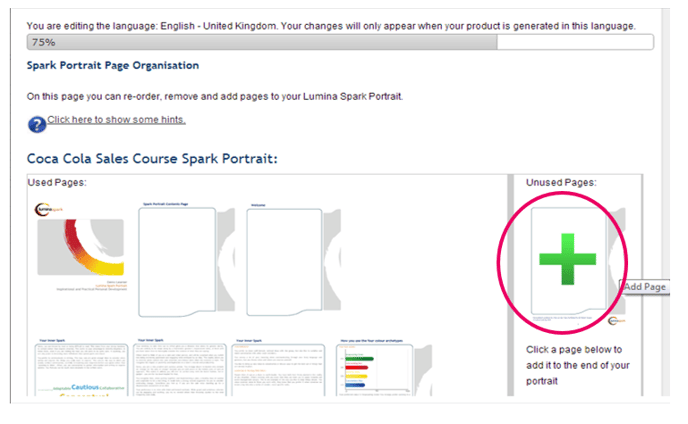
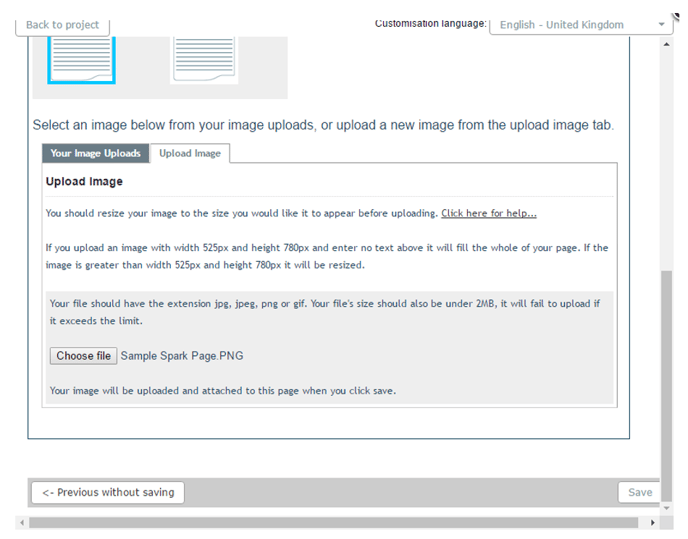
Option 1 – Enter text and upload an image
- Add a title, text and choose where to position your image. Each field is optional.
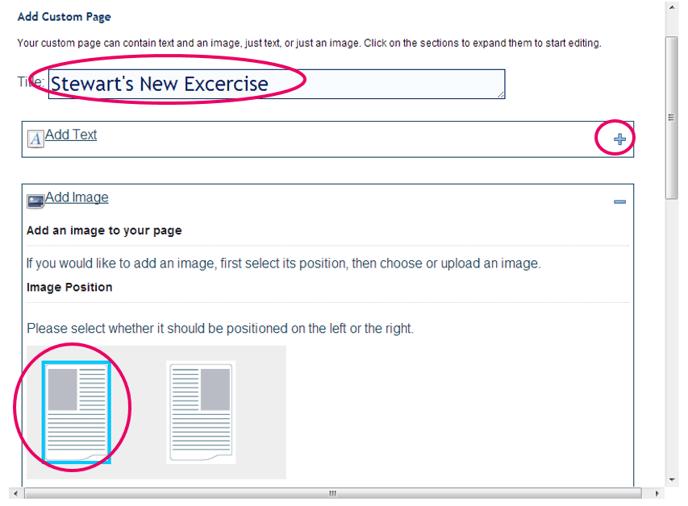
- Select an image to upload.
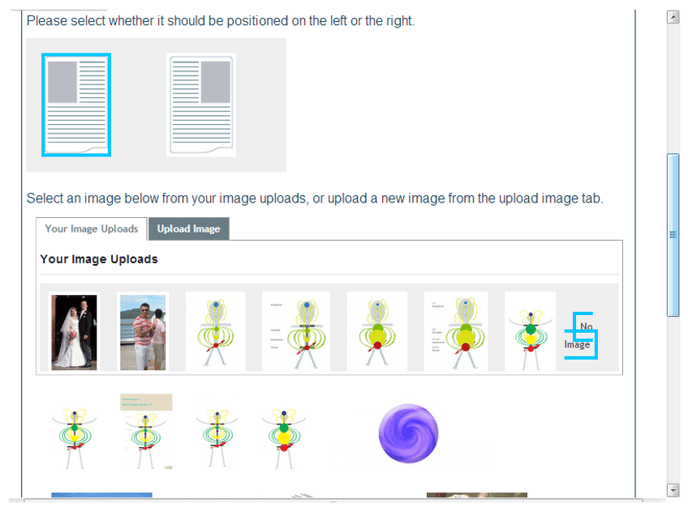
- Click Save and Continue.
Option 2 – Fill the page with a single image
Alternatively, you can upload a single image that fills the entire page.
Use your own image editing software (you must use your own software to create the image, this is not a feature within the Lumina system) to position text and multiple images in your preferred layout. This gives you total flexibility to design a page exactly as you want it. Save the image with the following format:
- Dimensions (exact): 525 pixel width, 780 pixel height
- File size (maximum): 2mb
- File format: jpeg, jpeg, png or gif
Upload the image, then press Save and Continue.
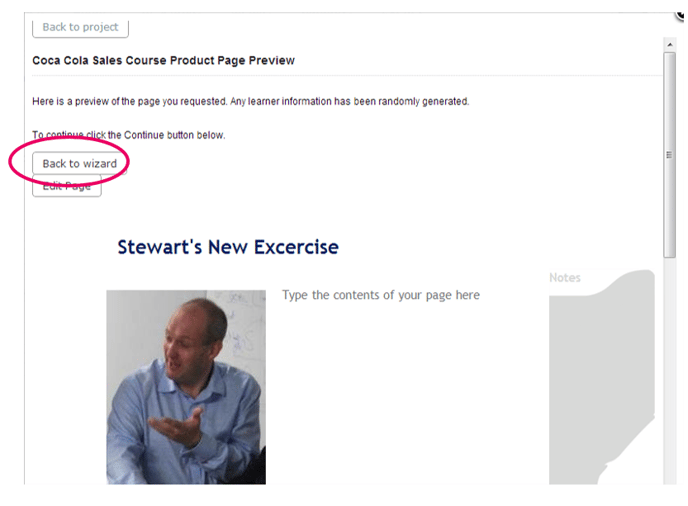
Once you are happy with your custom page, click Save and you will see a preview of how the page will look. Click Back to Wizard. The custom page will appear at the bottom of the right column with the excluded pages. You will need to click on the page to add it to the bottom of the left column where the included pages are. You can then rearrange the custom page to appear in your preferred order, in the Lumina Spark Portrait.
If you want to customise only the Lumina Spark portrait page order, you can skip the first part of the customisation process.
To follow the complete customisation process, please follow the full instructions above.
Other relevant guides:
How do I add custom Practitioner images to my Practitioner Profile, projects and portraits