Contents
- What are the different types of Practitioner image and where are they displayed? Which Portraits support Practitioner images?
- How to add, change or remove a Company Logo, Personal Photo and Signature
-
How to add, change or remove a project-specific Company Logo, Personal Photo and Signature
- How do I delete an image from my account?
What are the different types of Practitioner image and where are they displayed? Which Portraits support Practitioner images?
Company Logo
Your company logo is used across your Practitioner Profile and in all of your projects. It will appear in the following locations:
- Online registration page seen by participants when completing a task questionnaire.
- Lumina Spark Full Portrait, Lumina Spark Intro Portrait and Lumina Spark Workbook - on the front page of portrait in the top-right corner, and in the footer of every other page alongside the Lumina Spark logo.
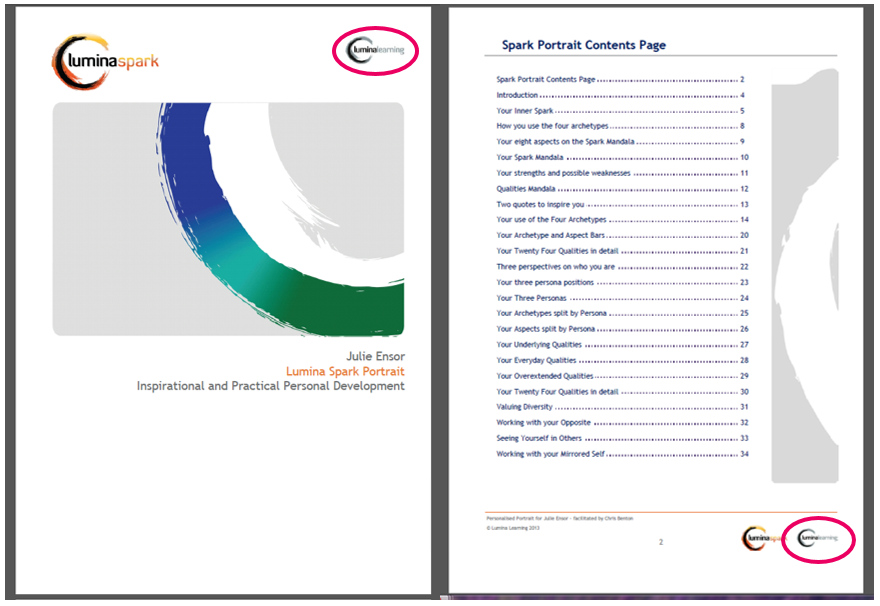
- Company logo cannot currently be included in other portraits.
Personal Photo
Your personal photo is used across your Practitioner Profile and in all of your projects. It will appear in the following locations:
- Lumina Spark Full and Lumina Spark Intro Portraits - on the welcome message page, above the welcome text.
- Personal photo cannot currently be included in other portraits.
Signature
Your signature image is used across your Practitioner Profile and in all of your projects. It will appear in the following locations:
- Lumina Spark Full and Lumina Spark Intro Portraits - on the welcome message page, below the welcome text.
- Your signature cannot currently be included in other portraits.
To upload your signature image, follow these steps.
Project logo (client logo)
Each project contains a logo that will be displayed in areas linked to your project. You could use this feature to upload the logo of the client that is sponsoring the project. The project logo will appear in the following locations:
- Online registration page seen by participants when completing a task questionnaire.
- Lumina Spark Full Portrait, Lumina Spark Intro Portrait and Lumina Spark Workbook - on the front page of portrait in the bottom-right corner, and in the footer of every other page alongside the Lumina Spark logo.
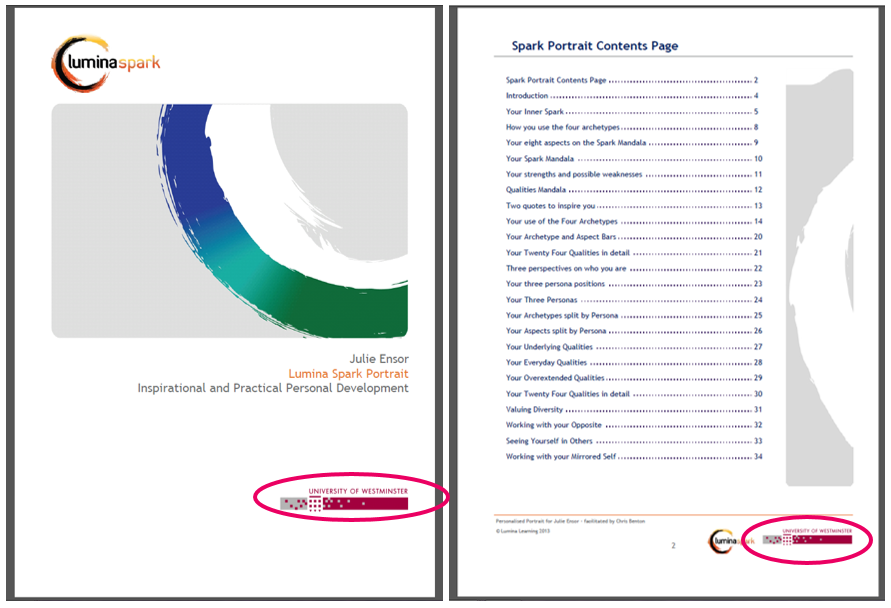
- If you have also configured a company logo and a project logo, both will be displayed on the portrait front cover but only the project logo will be displayed in the footer.
How to add, change or remove a Company Logo, Personal Photo and Signature
- Visit your Lumina Services and sign in.
- Select your Practitioner Profile button.
- Select Your Imagery in the left-hand menu.
Any images that you have already uploaded will be displayed under Media Gallery.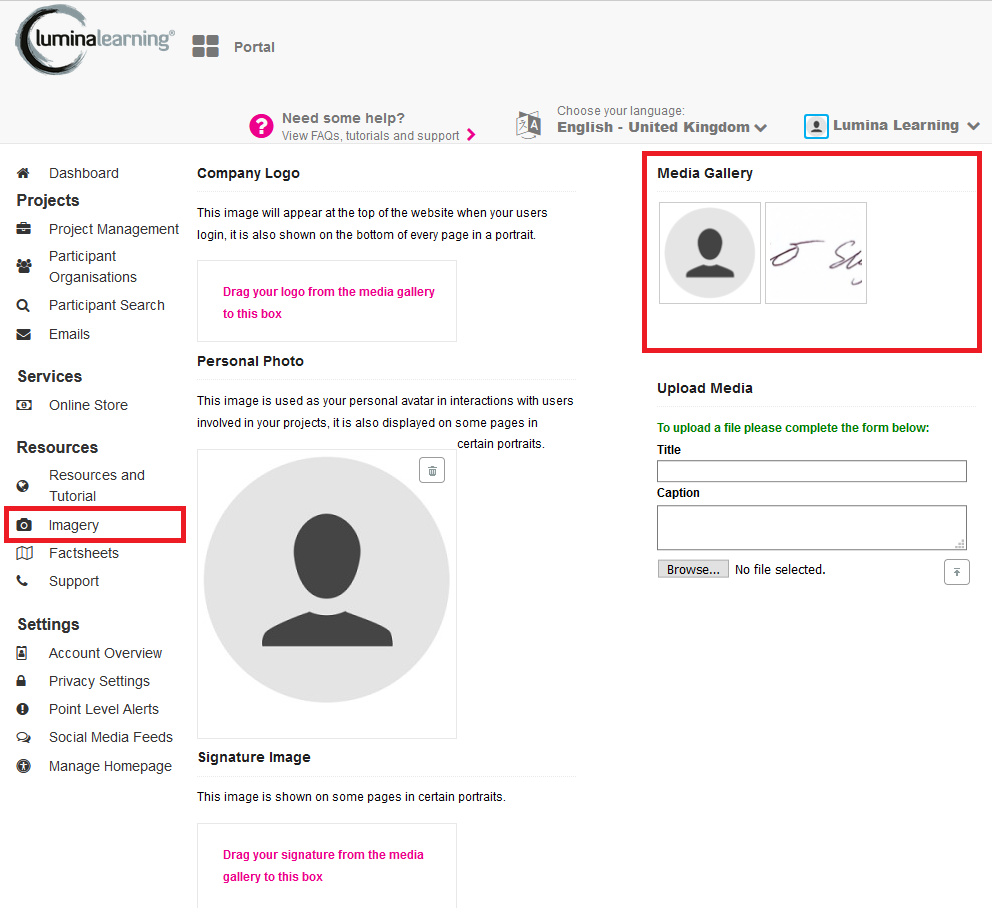
- To upload a new image to the Media Gallery:
- Under Upload Media, select Browse or Choose File.
- Browse your computer and select the image file.
- Enter a title and a caption for your image.
- Press the upload button (upwards arrow symbol).
If your image upload fails, please ensure that it meets the following conditions:
- Less than 1000x500 pixels
- Less than 2mb
- Has the format .gif, .jpg, .jpeg or .png
- To select an image from your Media Gallery for use as the Company Logo, Personal Photo or Signature Image, drag and drop the image from the Media Gallery to the relevant image box on the left.
If an image has already been selected, you can change it by dragging and dropping a new image on top.
After you drag and drop an image, if it does not appear on the left, try refreshing the page.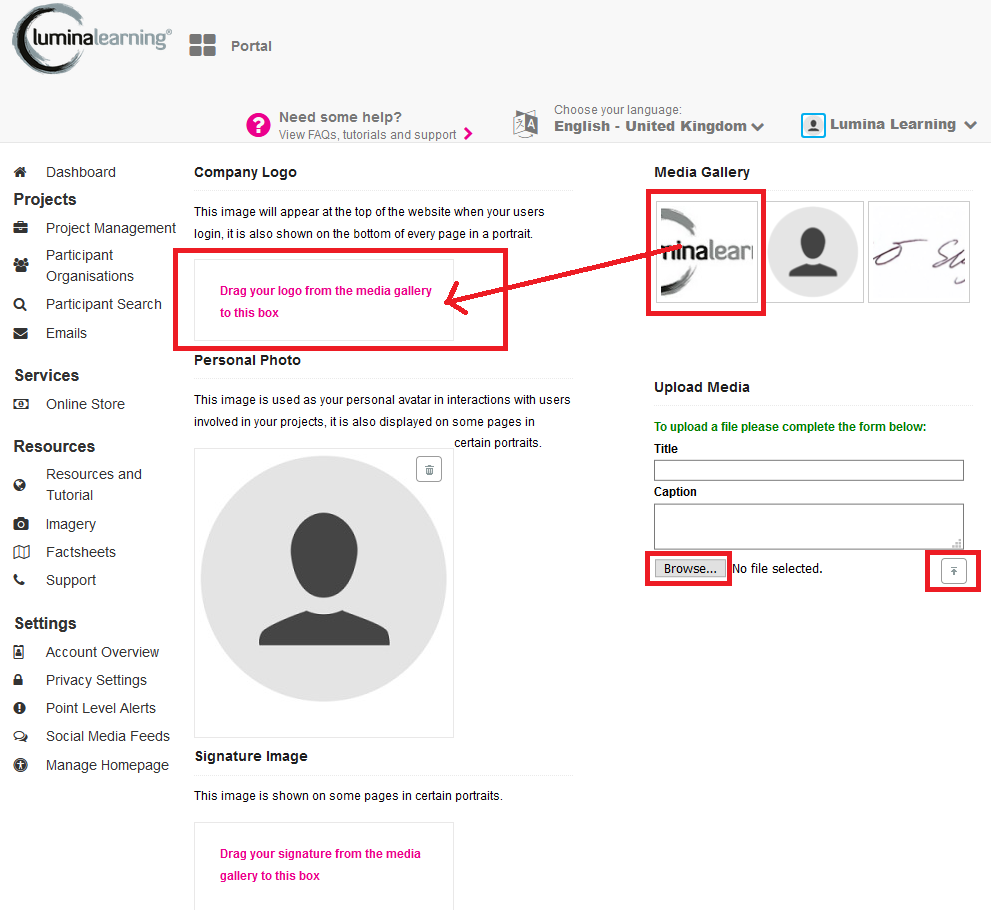
- To remove an image that has already been selected, hover over the photo and click the bin/trash icon. This image will no longer be used for the selected purpose. It is still saved to your Media Gallery in case you need it again later. To permanently delete an image, see these steps.
- You have now customised your Practitioner Profile with your images, which will be used in new portraits generated in future.
To apply your new images to any existing portraits in your projects, you must regenerate the portraits by following these steps..png?width=670&name=Practitioner%20imagery(3).png)
How to add, change or remove a Project Logo (client logo)
- Go to your Practitioner Profile dashboard (for full instructions, click here).
- Select Manage Projects in the left-hand or main screen menu.

- Select your project from the list.
- Select the Customisations tab. Beneath Project Logo, you will see available images from your Media Gallery.
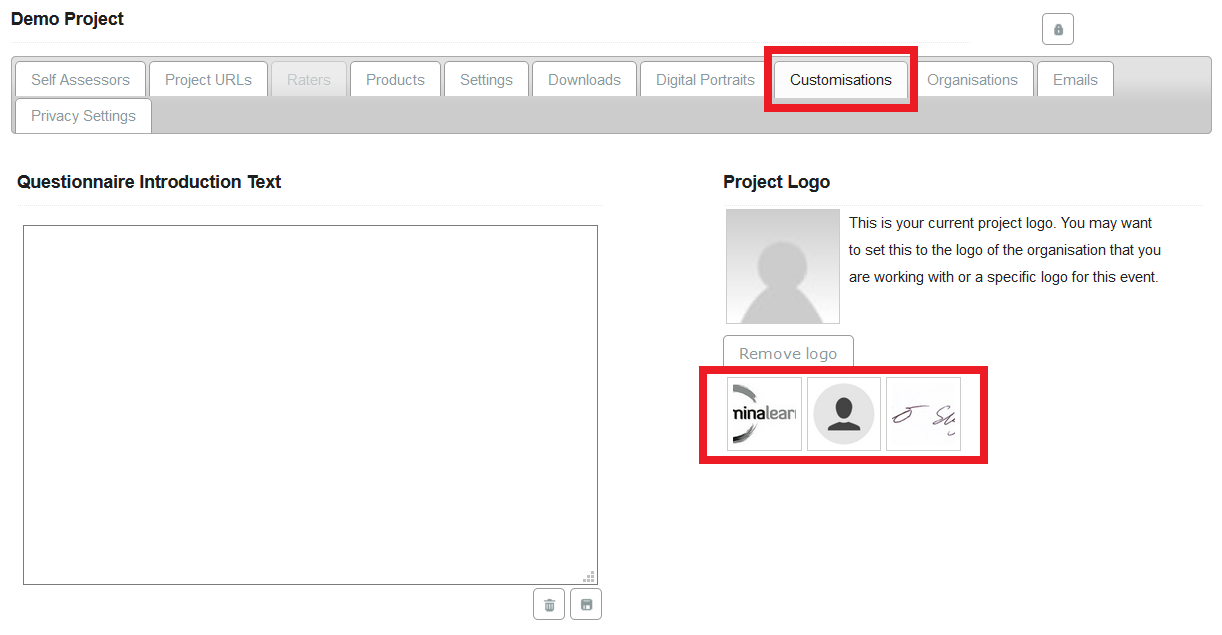
- To set an image as your Project Logo, click on the image. The image will appear under Project Logo.
If an image has already been selected, you can change it by clicking on a new image.
If the image does not appear after you click it, try refreshing the page.
If you need to upload a new image, add a new image to your Media Gallery by clicking here and following steps 1-4. Once uploaded, return here, select the image and proceed to the next step.
- To remove the project logo, select Remove logo. Any image previously selected will no longer be used as the project logo. The image is still saved to your Media Gallery in case you need it again later.
- You have now selected an image as your Project Logo, which will be used in new portraits generated in this project future.
To apply the new logo to any existing portraits in your project, you must regenerate the portraits by following these steps.
How to add, change or remove a project-specific Company Logo, Personal Photo and Signature
Your company logo, personal photo and signature are used in all of your projects by default.
These steps explain how to set a custom image in a specific project to override the default images.
- Go to your Practitioner Profile dashboard (for full instructions, click here).
- Select Manage Projects in the left-hand or main screen menu.
-
- Select your project from the list.
- Select the Customisations tab.
- Scroll down to the Override Global Imagery section where Company Logo, Personal Photo and Practitioner Signature are listed.

- Click the down arrow beneath the relevant image type. A drop-down menu will open. Select the relevant custom image from the list.
If you need to upload a new image, add a new image to your Media Gallery by clicking here and following steps 1-4. Once uploaded, return here, select the image and proceed to the next step.
- To remove the custom image, select No override. Your project will revert to using the default images that you have configured for your Practitioner Profile. (To change your default images, click here).
- You have now customised your project with your images, which will be used in new portraits generated in future.
To apply the new images to any existing portraits in your project, you must regenerate the portraits by following these steps.
How do I delete an image from my account?
- Visit your Lumina Services and sign in.
- Select your Practitioner Profile button.
- Select Imagery in the left-hand menu.
- Your Media Gallery will be shown on the right.
- Hover over an image and select the bin/trash icon.
After deleting an image, you will also need to remove it from any Practitioner images configured on the left-hand side of the page. Hover over the image and click the bin/trash icon.