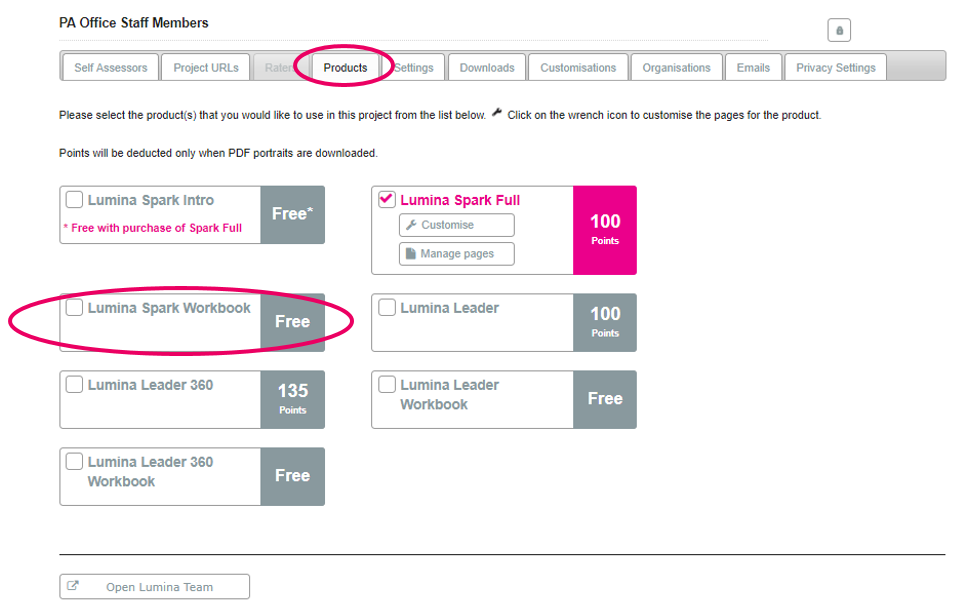
The Lumina Spark Workbook is a complementary product that can be used in conjunction with the Lumina Spark Portrait. The Lumina Spark Workbook is a free product and becomes available once you have downloaded the Lumina Spark Portrait for a Participant.
To enable the Lumina Spark Workbook, go to the Products tab in the relevant project and enable Lumina Spark Workbook.
You can now download the Lumina Spark Workbook in the Downloads tab.
Customising the Lumina Spark Workbook
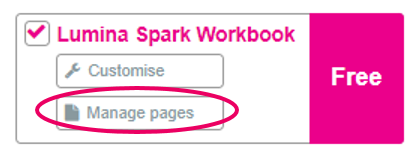
To customise the Lumina Spark Workbook, click on the wrench icon to the right of the product, listed in the Products tab.
This will take you through a Customisation Wizard. We will go through each of the steps here.

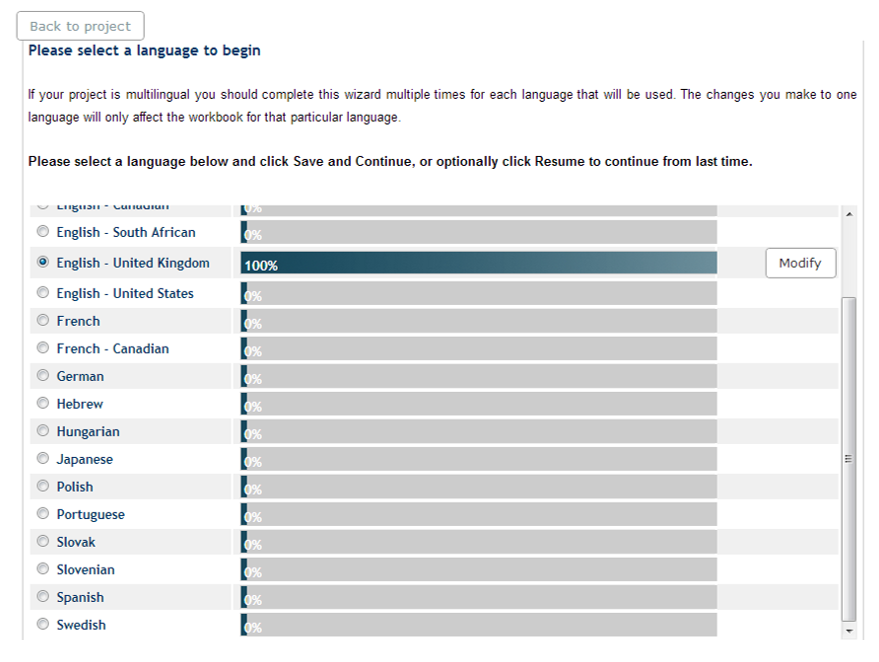
Step 1 - Language Selection
Choose the language in which you wish to customise the workbook (the default is English UK). You can customise in multiple languages for each project. If you would like to regenerate the workbook in a different language to English UK you will need to customise it here as well.
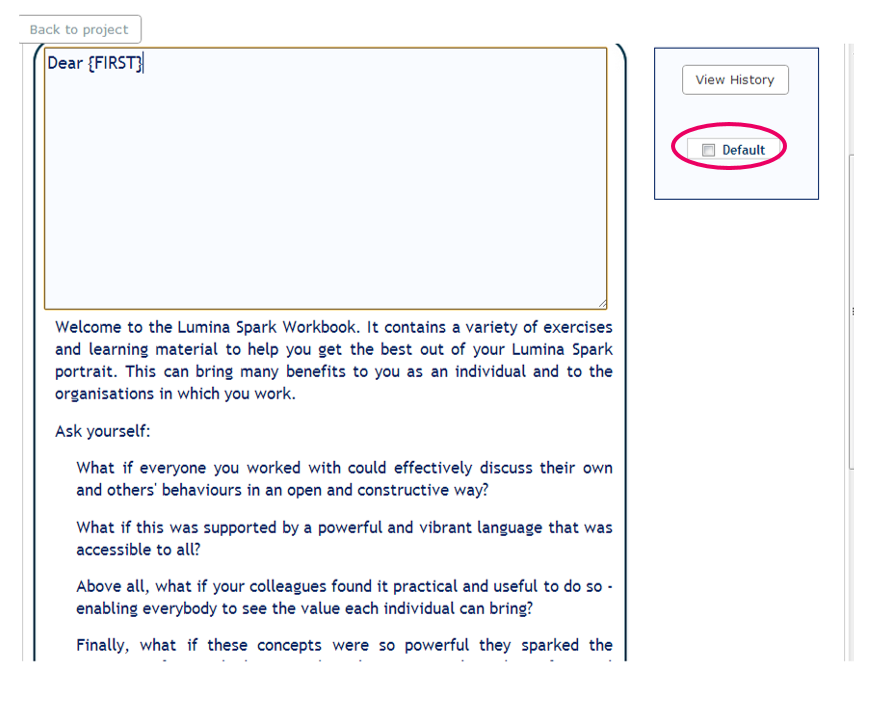
Step 2 - Add an introductory text
You can choose to add a personalised introduction to the workbook. There is also a default introduction welcome text if you prefer this. Any text you write will be added to the original welcome text.
If you add in the symbols {FIRST} and {LAST}, these will be replaced in the workbook with the Participant's First and Last name respectively.
Select Default to save your default setting.
View History allows you to view any personalised text you have used in the past.
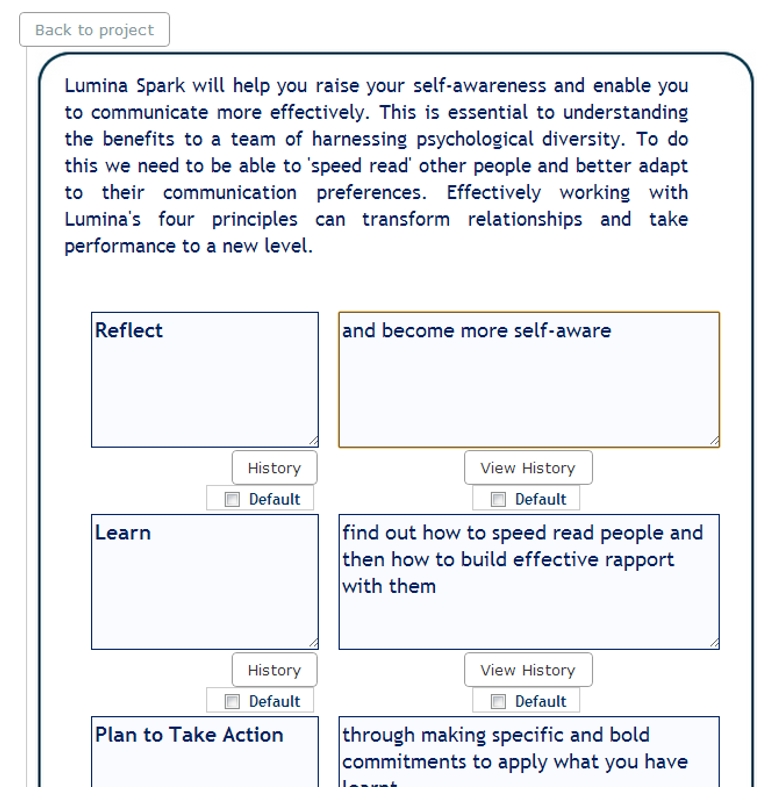
Step 3 - Entering Summaries of the Four Lumina Principles
You can add your own text under Self Knowledge and there is another text box at the end of the page for additional text. There is default text set automatically. Once you are happy with your edits, select Save and Continue.

Step 4 - Add Four Objectives
Again there is default text which you can choose to edit. Once you are happy with your edits, select Save and Continue.
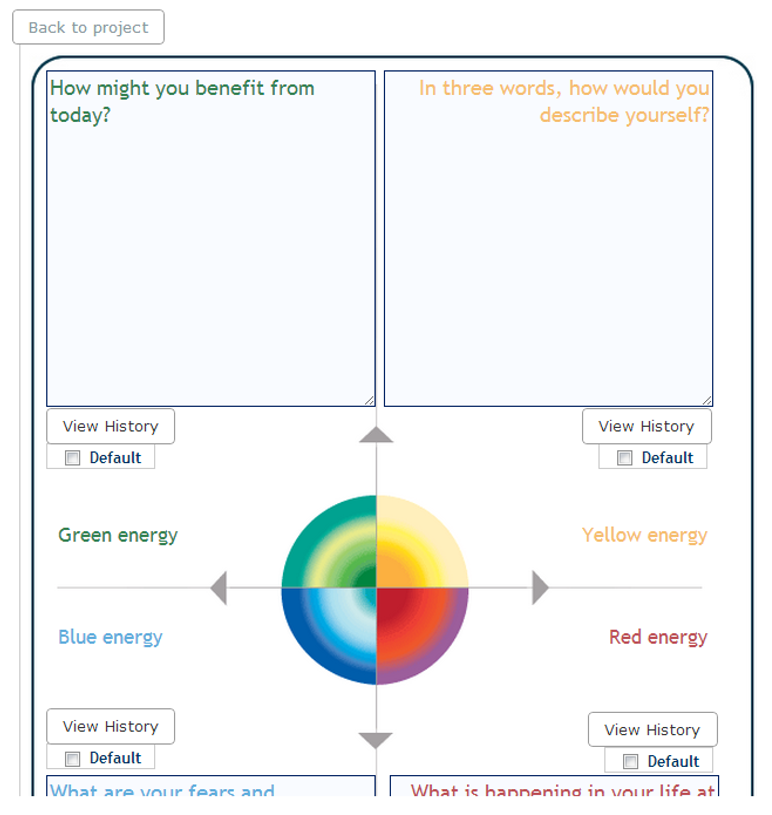
Step 5 - 4 Quadrant Questions
You can choose to edit the questions associated with the four quadrants. Four default questions are already pre-set.
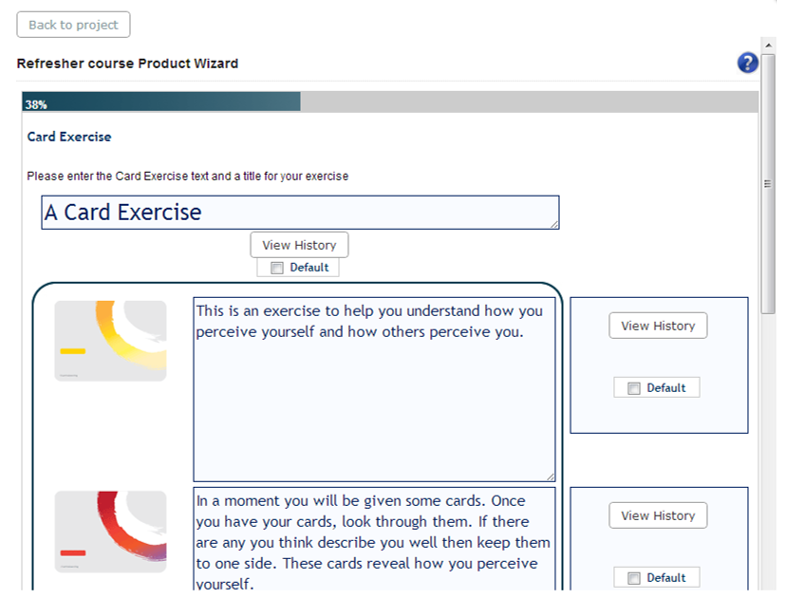
Step 6 - Card Exercise
You can choose to edit the title of the exercise as well as the description of the exercise. Once you are happy with your edits, select Save and Continue.
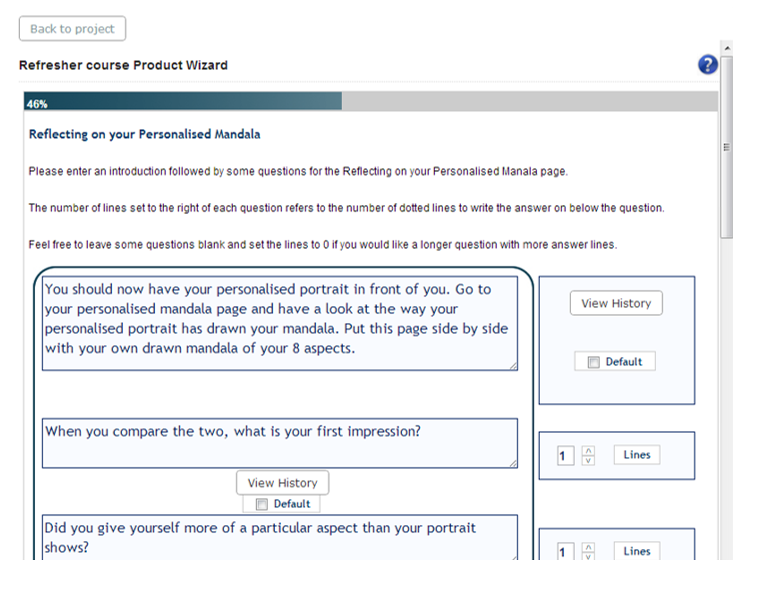
Step 7 - Setting Reflective Questions for the Mandala
You can choose to edit the questions regarding the Participants' impression of their mandala. Set the number of answer lines to reflect the answer size you wish to provide.
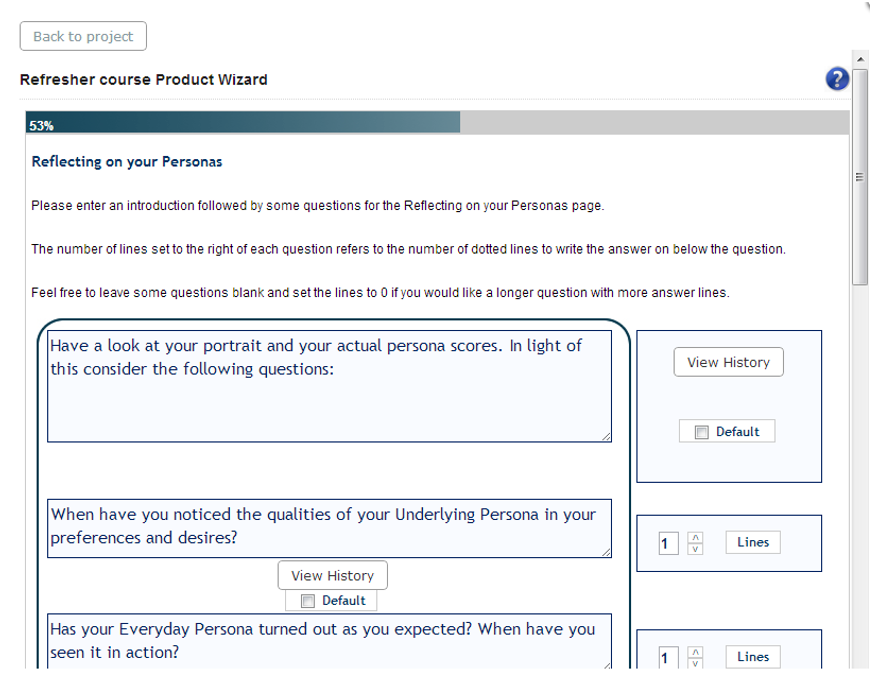
Step 8 - Setting Reflective Questions for the Personas
You can choose to edit the questions regarding the Participants' impression of their persona scores. Set the number of answer lines to reflect the answer size you wish to provide.
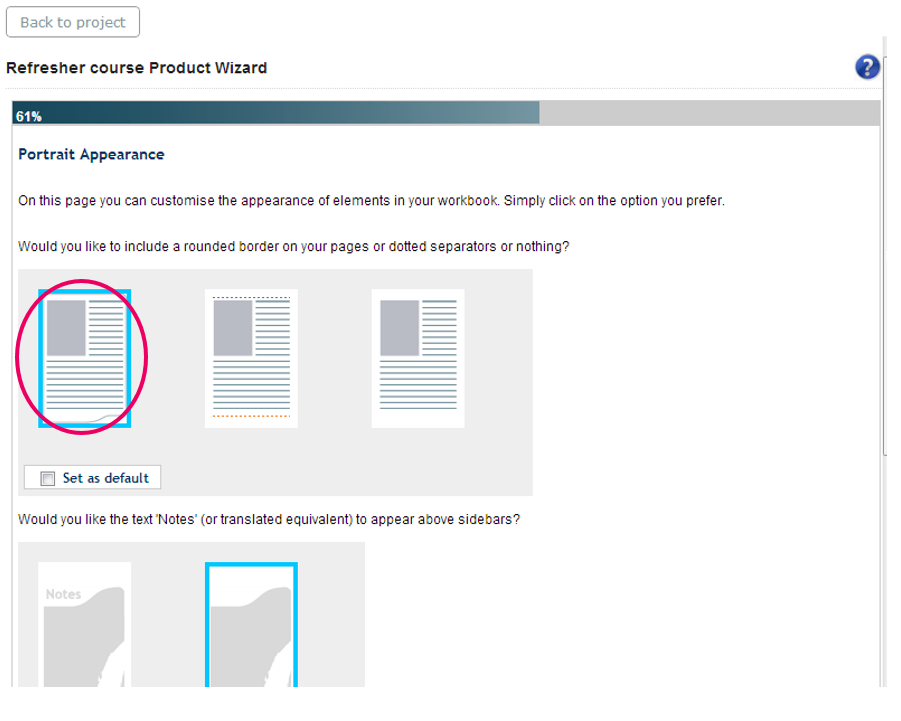
Step 9 - Portrait Appearance
Select from some options that relate to the portrait's appearance. Select Save and Continue once you are happy with these changes.
This concludes the text customisations that can be done in the Spark Workbook. The next section allows you to rearrange, add and remove pages.
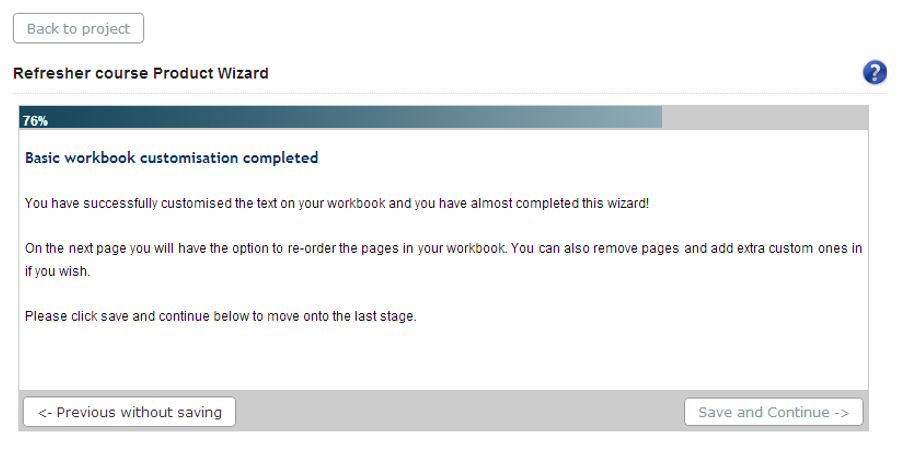
Step 10 - Rearrange, Add and Remove Pages
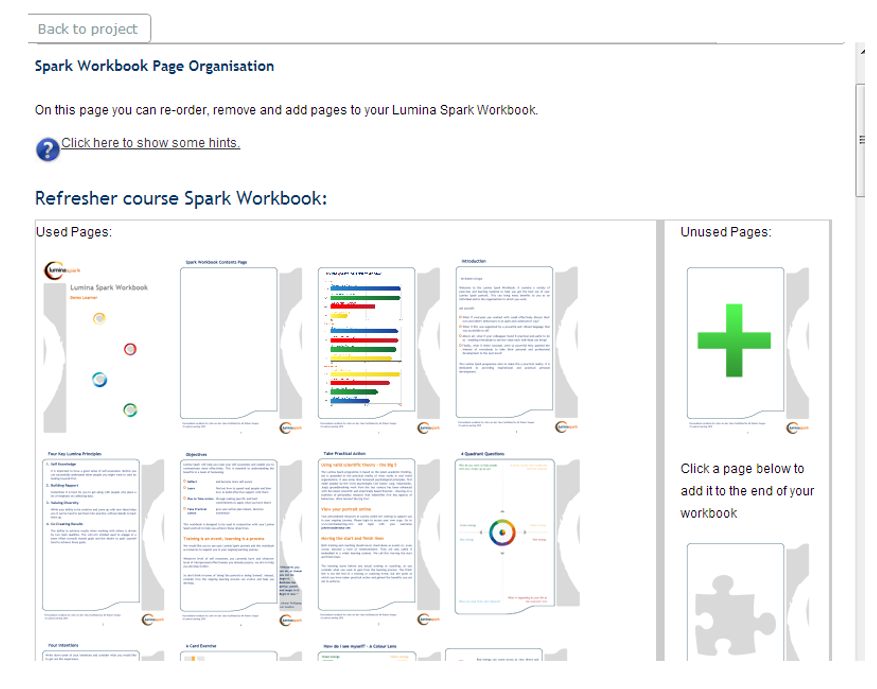
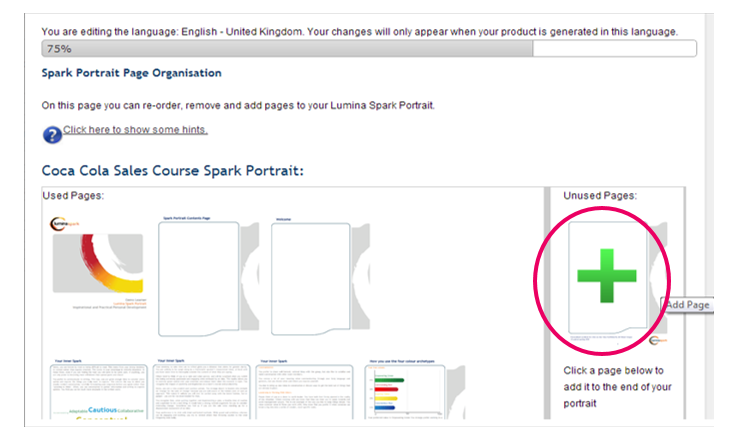
This section of the wizard allows you rearrange, add, and remove the pages in the Lumina Spark Workbook. If you wish to get to this step of the wizard directly without going through each of the previous steps, click the Manage Pages icon next to the wrench in the Products tab.
All pages in the left section represent the pages in your workbook, while all the pages in the right column represent those pages available for inclusion.
- To rearrange the pages, drag and drop them where required.
- To add any pages from the right column, click them and they will now appear at the bottom of the left column.
- To remove pages, hover over the relevant page(s) and select Remove.
At the bottom of the page you can choose to change this new order to your Default Order. If you do not change it to your default order, all your changes will be saved for that project, until you make further changes. If you regenerate or download a portrait, they will be displayed in this format.
By setting a layout as a Default Order, all future projects you make will have this layout as its default setting. Also, when you select Reset to Default in any project, it will return to this default layout. This includes all old projects also and will need to be regenerated.
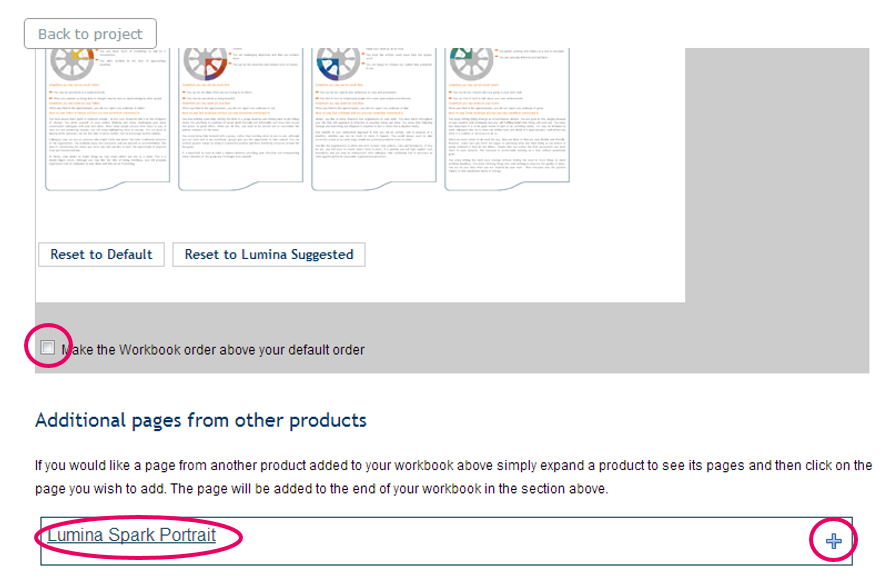
Step 11 - Add in pages from the Lumina Spark Portrait
You can choose to add in pages from the Lumina Spark Portrait into the Lumina Spark Workbook. To display the pages in the portrait, click the plus sign (see above). Click on the pages you wish to add. They will now appear in the section above where you can then rearrange them.
Step 12 - Add a Custom Page
You can choose to include a Custom Page. To do this, select the page with the green cross.
Step 12 Option 1 – Enter text and upload an image
Add a title, text and choose where to position your image. Each field is optional.
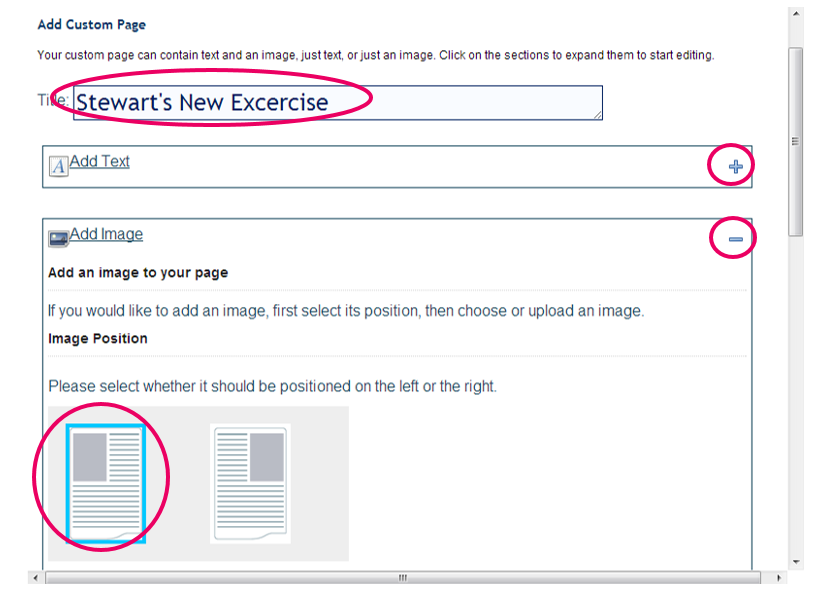
Select an image to upload.
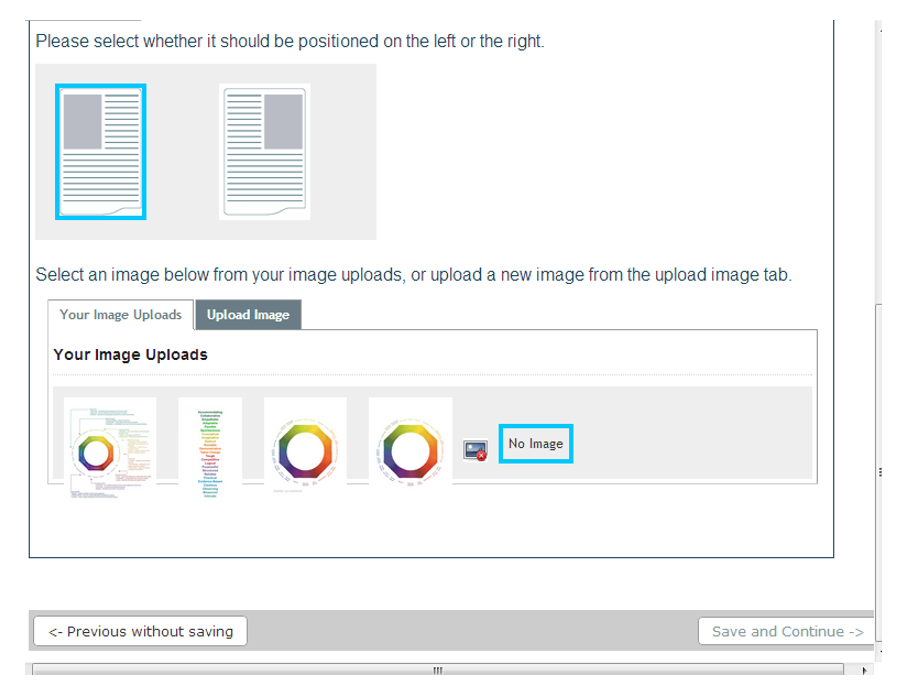
Click Save and Continue.
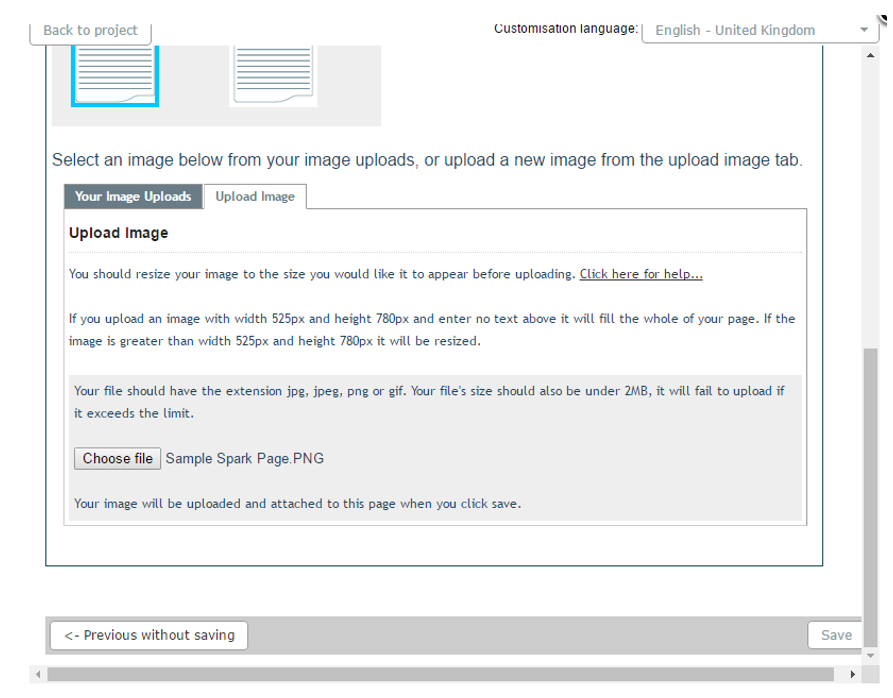
Step 12 Option 2 – Fill the page with a single image
Alternatively, you can upload a single image that fills the entire page.
Use your own image editing software (you must use your own software to create the image, this is not a feature within the Lumina system) to position text and multiple images in your preferred layout. This gives you total flexibility to design a page exactly as you want it. Save the image with the following format:
- Dimensions (exact): 525 pixel width, 780 pixel height
- File size (maximum): 2mb
- File format: jpeg, jpeg, png or gif.
Upload the image, then press Save and Continue.
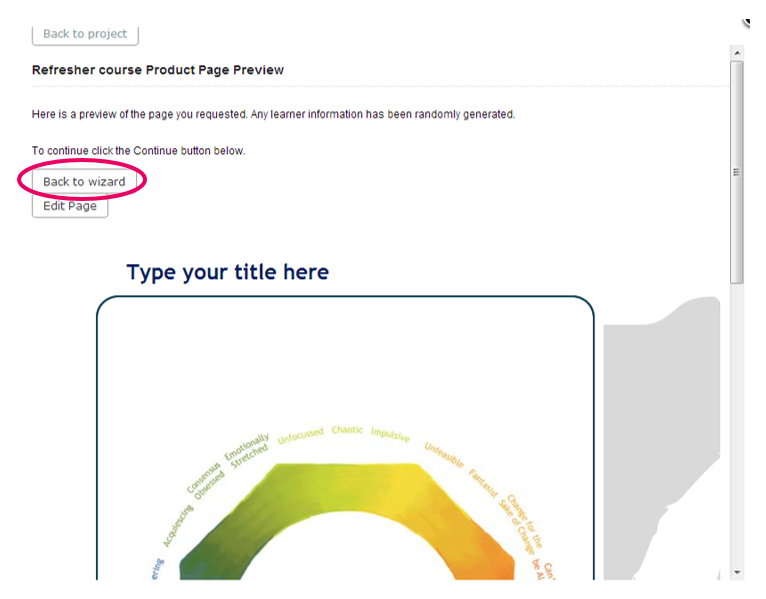
After you click Save, you will see a preview of how the page will look. Click Back to Wizard. The custom page will appear at the bottom of the right column with the excluded pages. You will need to click on the page to add it to the bottom of the left column where the included pages are. You can then rearrange the custom page to appear where you would like in the portrait.
Step 13 - Regenerate
These changes will be present on all workbooks you download in that project in the future, until you make further changes.
To activate these changes in existing workbooks you will need to Regenerate the workbook(s) before downloading.
Other useful guides: